NetSuite - Token Based Authentication Cloud Services
NetSuite Analytics NetSuite Integration AWS Migration APEX SMTP Integration Backup & Disaster Recovery Oracle Fusion Analytics(OAX) Oracle BYOL Hybrid Benefit
NetSuite - Token Based Authentication (TBA)
Please take note that an integration using NetSuite Token-Based Authentication (NTBA) requires the following values to be set:
- Consumer Key
- Consumer Secret
- Token ID
- Token Secret
NetSuite Token Based Authentication (TBA)
Following are the steps to use NetSuite Token-Based Authentication (TBA):
- Enable Token Based Authentication
- Create Integration record
- Create a Role and assign to a User
- Create an Access Token for the Integration record, User, and Role
How to enable NetSuite - Token Based Authentication (TBA):
- Go to Setup → Company → Enable Features → Suite Cloud → Manage Authentication
- Enable Token Based Authentication
How to simply create an Integration Record:
- Go to menu Setup → Integrations → Manage Integrations
- Tap the New button
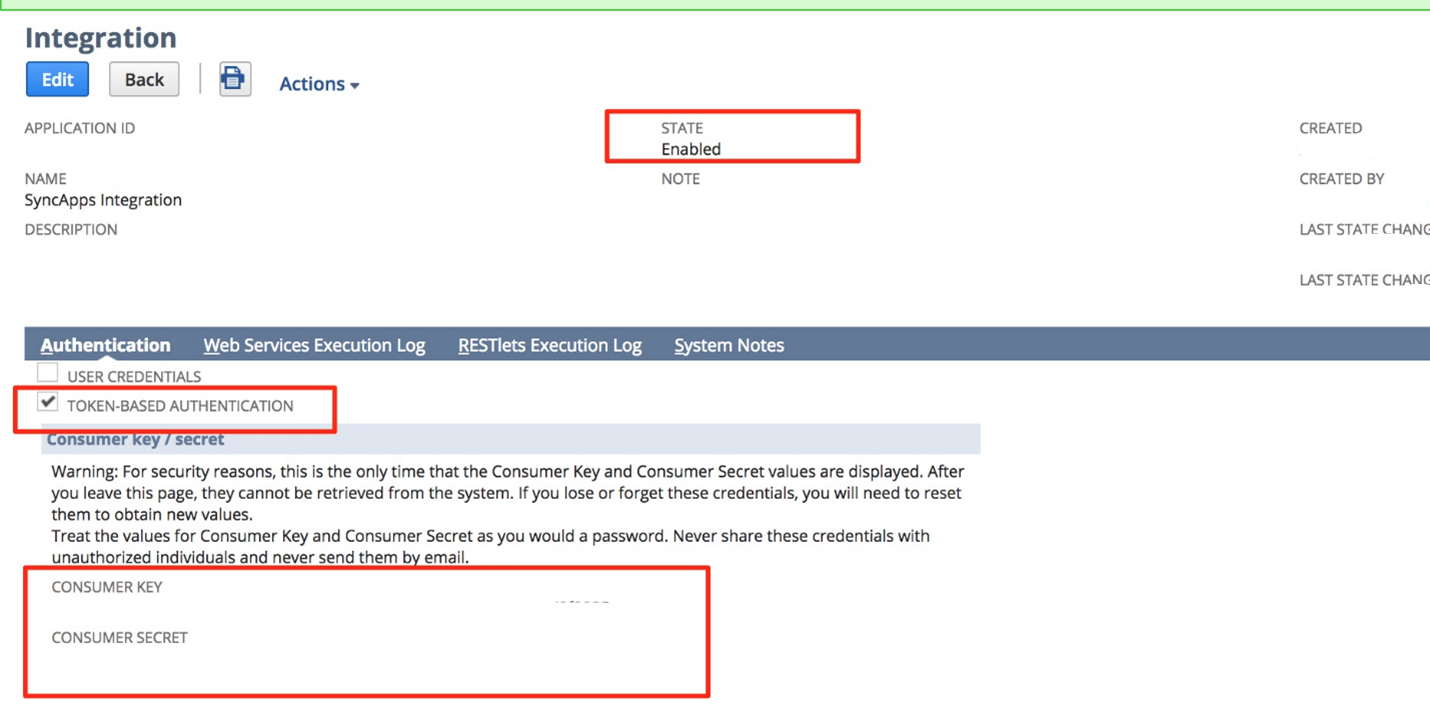
- Set the name to "SyncApps Integration". Please make sure to tick the Token-Based Authentication option.
- If you already have an integration record for SyncApps, you can reuse it by editing the integration and ticking the Token Based Authentication option.
- Please copy Consumer Key and Consumer secret values to be used in Sync Profile configuration.
Please take note that Consumer Key and Consumer Secret values are displayed only once, so please make sure you copy them before going to another page. You can also reuse the consumer key and consumer secret to link one integration (consumer key and consumer secret) to multiple access tokens.
How to create a Role and assign to a User:
- Go to Setup → Users/Roles → Manage Roles → New.
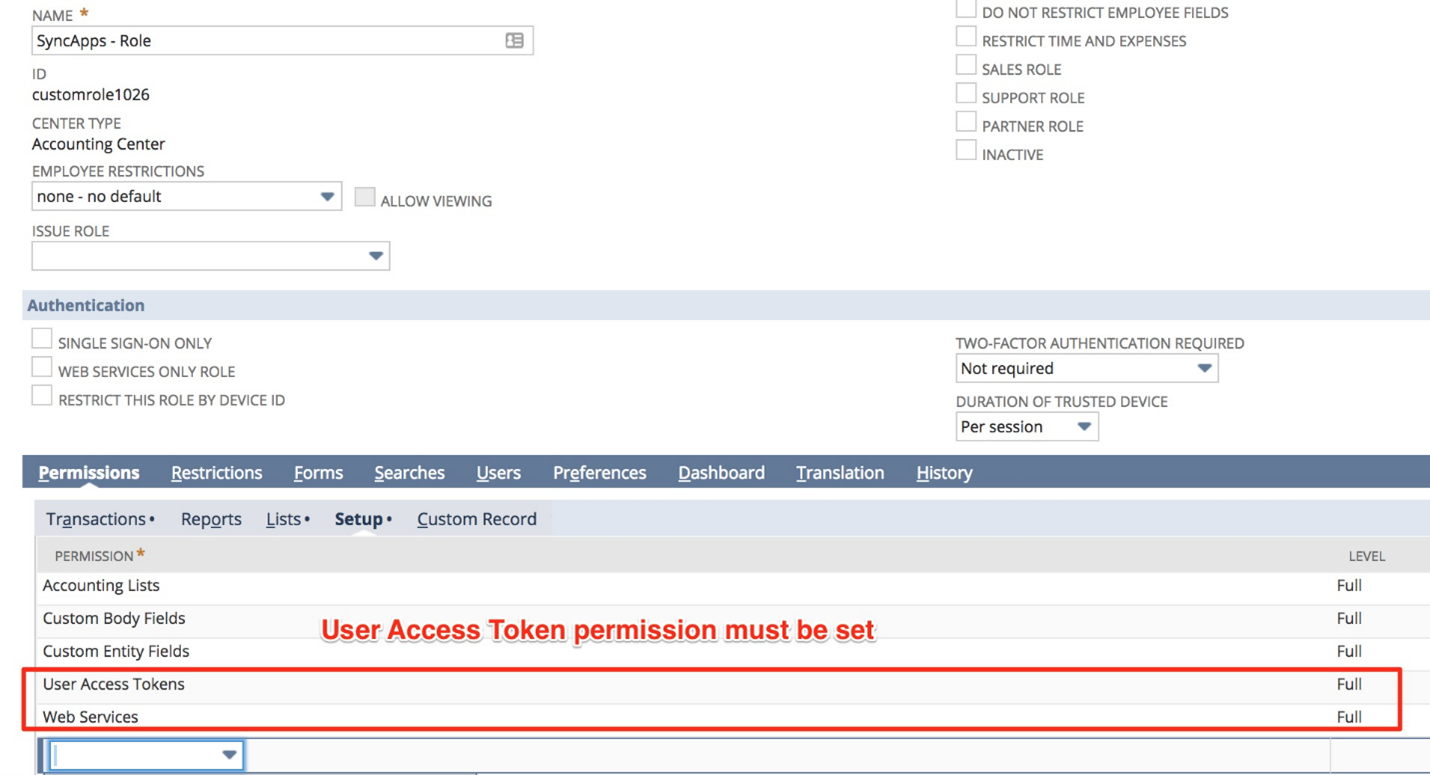
- Create a role and assign necessary permission for SyncApps integration. Please tap here for the list of permissions required for SyncApps.
- The role must have "User Access Tokens" permission for integration using TBA.
- Assign the Role to the desired user that will be used for integration. Go to Lists → Employees → Edit User → Access Tab → Roles Subtab
How to create an Access Token for the Integration record, User, and Role::
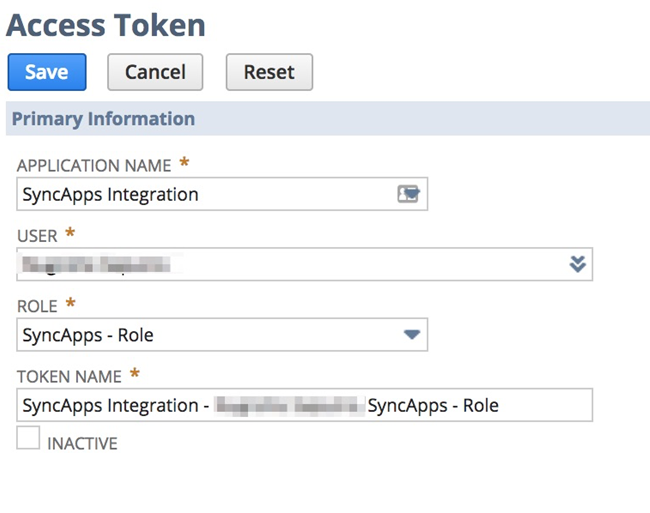
- Go to Setup → Users/Roles → Tokens → New.
- Select the Integration record, User, and Role created or referenced in the previous steps.
- Token ID and Token Secret will be displayed after tapping the save button. Please copy the Consumer Key and Consumer Secret values to be used in the Sync Profile configuration.
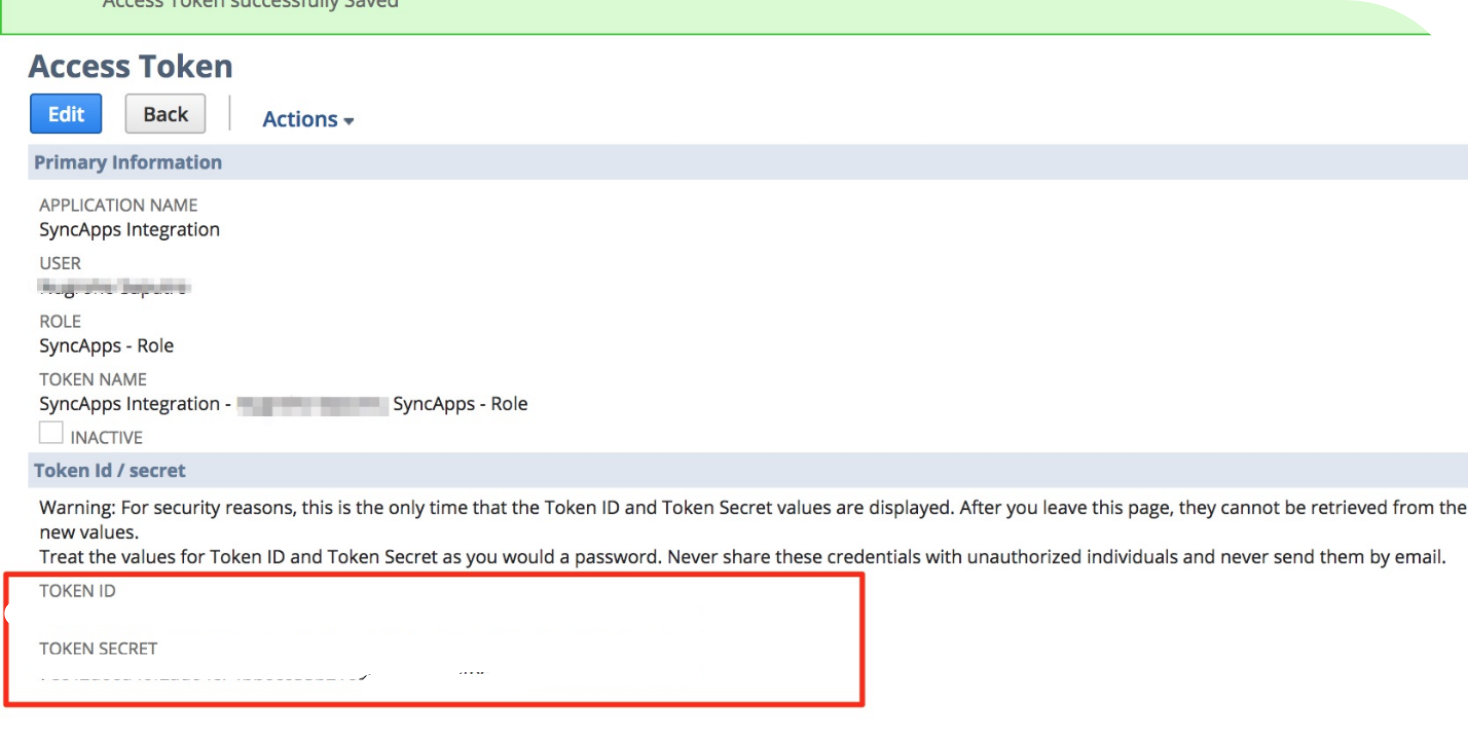
Once completed, you can now use the Consumer Key, Consumer Secret, Token ID, and Token Secret for single or multiple Sync Profile configurations.
For those customers that do not want to authenticate their Formstack Sync NetSuite integration using a Full Administrator user can follow the steps below to create a new Integration User with the minimum permissions needed to allow for the sync to function.
- Create a New Role ( Setup → Users/Roles → Manage Roles → New).
- Name the role "Formstack Sync Integration"
- Set the Center Type to System Administrator Center
- If you are OneWorld customer, select the appropriate subsidiaries. This is not required if you are not a OneWorld NetSuite customer
- Populate the Permissions tab per the table below
- Ensure "Web Services Only Role" is Unchecked
- Click Save
- Find your User (Setup → Users → Manage Users) and click on the User Name.
- Click Edit
- Go to Access Tab and add the "Formstack Sync Integration" role.
- Click Save
- Go to Formstack Sync and auth a connector with your user and password and then select the Formstack Sync Integration Role
| Sub-Tab | Permission | Level |
|---|---|---|
| Transactions | Opportunity | Full |
| Lists | Contact Roles | Full |
| Lists | Contacts | Full |
| Lists | Customers | Full |
| Lists | Employees | Full |
| Lists | Employee Record | Full |
| Lists | Tasks | Full |
| Lists | Event | Full |
| Lists | Cases | Full |
| Setup | Deleted Records | Full |
| Setup | Enable Features | Full |
| Setup | Set Up Company | View |
| Setup | Web Services | Full |
| Setup | User Token Access | Full |
| Setup | Custom Body Fields | View |
| Setup | Custom Column Fields | View |
| Setup | Custom Entity Fields | View |
| Setup | Custom Fields | View |
| Setup | Custom Event Fields | View |
| Setup | Custom Item Fields | View |
| Setup | Custom Item Number Fields | View |
| Setup | Custom Lists | View |
| Setup | Custom Transaction Fields | View |
| Setup | Other Custom Fields | View |